English
Castellano
Català
Building Display Cabinets
Author: George Campbell
Content by courtesy of : OsoSoft Mineral Connection
Reproduction of text and photos prohibited without permission of author.
Some of OsoSoft's Mineral Cabinets(And How To Build Them)

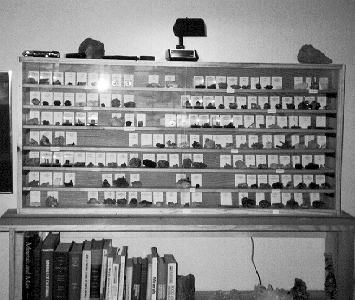
This pine cabinet is designed specifically for thumbnail specimens, and is roughly 2' x 4' in size and only 4.5" deep. The seven shelves are spaced about 3" apart and a groove is cut in the back of each shelf to hold the labels for the specimens. I space the minerals about 1.5" apart. This small cabinet can hold up to 200 thumbnail specimens. It rests on a bookshelf made of the same materials. The whole project cost less than $50 to build and took about 4 hours.

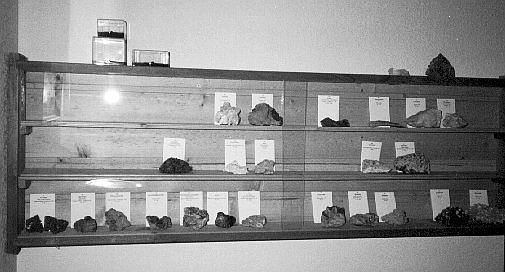
This cabinet, made of redwood, is 48" long and 18" high. It's designed to hold small cabinet and fist-sized specimens and has sliding glass doors to protect the specimens. It's a lot fuller now than in this photo.
The cabinet hangs directly on a wall, with screws driven into the wall studs. It took very little time to build and makes a nice presentation for some of my larger specimens.
Building Display Cabinets
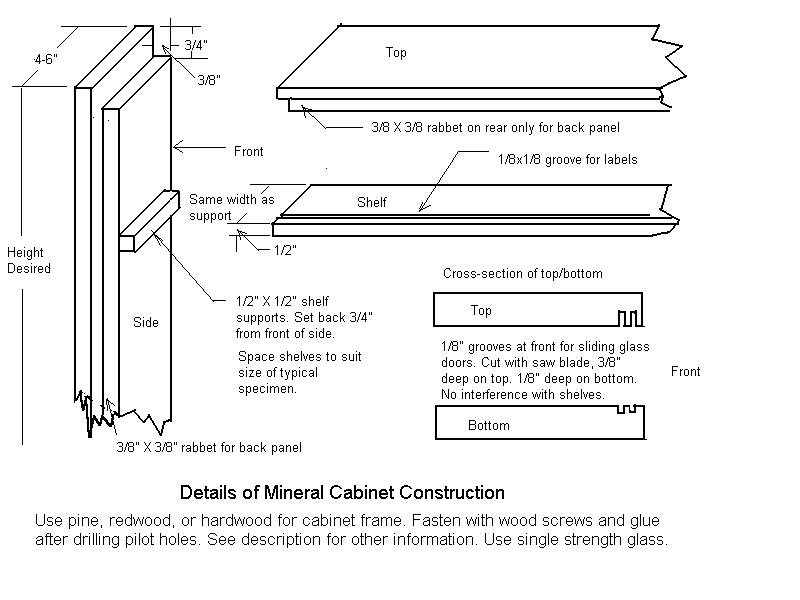
Detail Drawing of Mineral Cabinet Construction

Displaying minerals can be a tough job, and most cabinets available are not designed for minerals. Most of us make do with miscellaneous displays, but if you're handy with tools, it's fairly easy to make nice looking and practical cabinets for those minerals you want on display.
The two cabinets illustrated here are couple of easy-to-make cabinets, with sliding glass doors. Either can hang on the wall or be perched atop bookshelves. They aren't fancy, but you can make them in just about any home workshop.
Space the shelves according to the size of the specimens to be displayed. I use 1/2" thick pine molding for the shelves. It's available in widths up to about 6", and is suitable for shelves up to 4' long if supported in the middle.
Finish your cabinets with a low-gloss varnish or a simple oil finish, but leave the inside unfinished to prevent fumes from damaging your specimens. You can use any wood you like in these cabinets and make the corner joints any way you're comfortable with. You'll need a full back, though for stability. Try 1/4" birch plywood. It's cheap and strong. Or use masonite for the back.
The key to the sliding glass doors is to cut grooves in the top and bottom pieces of the box. Two grooves allow for the doors to pass each other. Make the top grooves about 1/2" deep, with the bottom grooves about 1/8" deep. You can use a router with a guide or a dado blade on your table or radial arm saw. The grooves should be about 1/8" to 3/16" wide.
Have your glass cut just over half the length of your cabinet opening and 1/4" higher than the opening itself. You have to get a precision size here. Then, with the cabinet finished, the glass slips into the top groove far enough to allow it to be placed in the bottom groove. For handles, use super glue to attach small knobs directly to the glass.
Content by courtesy of :
Information | Mineral photos | VIDEOS | Articles | Fairs | Web directory | Classified ads | Minerals Books | Shop


